How to Delete Your iPhone
Whether you are deleting your phone to upgrade to a different model or are just deleting to free up space, here are some steps to follow for how to delete your iPhone. First, you will need to organize your apps into folders. Once you have done that, you can delete your contacts, photos, songs, and data.
Organize your apps into folders
Organizing your apps into folders is a great way to organize your phone. Having a consistent layout can help to avoid confusion, as well as save battery life. In addition, organizing your apps into folders can help you to locate apps quickly and easily.
If you’re organizing your apps into folders, you can do so by category, purpose, or frequency of use. If you’re a visual person, you can also organize your apps by color. Organizing by color is a great way to add visual appeal to your phone. You can also use emojis to label similar apps. You can also create a long rainbow trail of colors.
If you’re looking to organize your apps into folders, you should make sure you label your folders clearly. This way, you’ll have easy access to all your apps. You should also tell your family about your plan for organizing your apps.
Another way to organize your apps is to assemble the apps you use the most at the top of your screen. This way, you’ll have quick access to your favorite apps when you’re on the go. You can also put a quick access app at the bottom of your screen.
Another way to organize your apps is to rename them. You can rename apps by tapping them and dragging and dropping them to the desired folder. You can also rename a folder by selecting it, tapping the “name” tab, and typing in a new name.
Organizing your apps into folders is also a great way to free up storage space on your phone. Creating folders can make it easy to add new apps to your phone. You can also move folders from one Home screen to another.
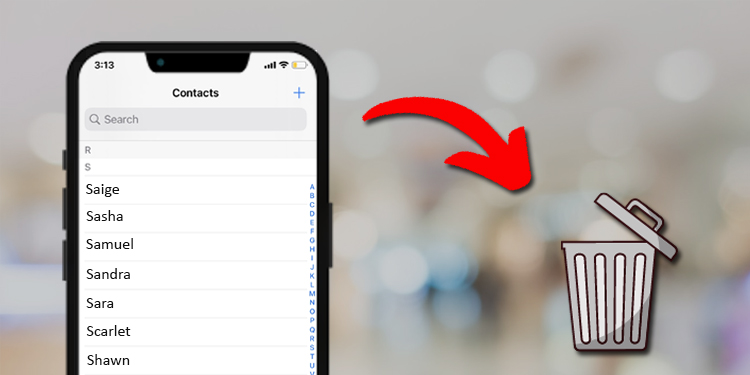
Delete all contacts from your phone
Whether you have forgotten to delete your contacts from your iPhone or just want to clear out the old, iCloud is a convenient way to do it. It also syncs all your contacts across all of your iCloud-connected devices.
To delete all contacts on your iPhone, you need to sign into your iCloud account on your computer. It also helps if you use the same Apple ID on both devices. Once you’ve signed in, you can go to the Contacts section of the Settings app.
The Contacts app will show you a list of your contacts. You can delete single contacts or groups of contacts, depending on your preferences.
You can also delete contacts in bulk using a third-party app. AnyTrans is one option, and it’s available for the iPhone and Mac. It’s free, and it can transfer a variety of data, including contacts. It’s also compatible with the latest iPhone models.
In addition to deleting contacts in bulk, AnyTrans also helps you transfer data, such as photos, music, and apps. It’s also one of the only apps to support the latest iOS 16 version.
The Contacts app has a Delete Cards button on the right side of the screen. You can click this to select a single contact, or hold the Control/Command (Ctrl/Cmd) key and select multiple contacts.
The Contacts app also has an edit option. You can change a contact’s name, display order, and short name. You can also enable contact syncing. If you disable contact syncing, you will not be able to sync your contacts with other applications.
The best way to delete all contacts on your iPhone is to use iCloud. It’s the quickest and easiest way to do it.
Delete all photos from your phone
Delete all photos from your iPhone is not a trivial task. Apple does not provide a “select all” option. However, there are a few steps you can take to get the job done.
The first step is to open the iOS Photos app. This app is located in the bottom left corner of your screen. You can also access it by tapping on the Settings icon at the top of your screen.
Next, you’ll want to navigate to the Library tab. This tab displays the hierarchy of photos. It organizes them by Months, Years and All Photos. You can also delete individual photos or albums from this tab.
The next step is to select the photos you want to delete. To do this, you can either swipe across the photos or hold your finger in place and drag it across the screen. You’ll know you’ve selected the photos by the blue tick on the photo.
If you need to save a photo to your computer, you can back it up with an app like Dropbox or AirDrop. If you have more than a few photos to back up, you may want to consider purchasing a bigger SD card or paying a little extra for iCloud storage.
To see how much space you’re wasting, you can check out the bar graph that displays the amount of storage you’re using. Depending on how you’re using your iPhone, you’ll want to delete the pictures you don’t need to keep.
Finally, you may want to consider sending your photos to your computer, instead of deleting them from your iPhone. This will allow you to keep your phone’s iCloud sync intact.
Delete songs from your music apps
Delete songs from your music apps on your iPhone is a quick and easy process. You can delete individual songs or entire albums. It’s also a good idea to free up some space on your device for downloading other apps or pictures.
First, you need to open the Music app. You can do this from the bottom right corner of your screen. You will see a list of apps. The apps are arranged by the amount of storage they use. If you see an app that has no free space, you can delete it.
Once you’ve opened the Music app, find the song you want to delete. Tap and hold on it. A 3D pop-up window will appear. You can then peek and pop the song you’re trying to delete. After you pop it up, press the minus sign to delete it. This will remove the song from all Apple Playlists.
You can also delete individual songs by swiping left on them. If you want to delete all songs, you can tap the “All Songs” header. Then, you can tap the minus sign next to each song you want to remove. This will remove all of the songs in the Music app.
You can also delete music from iTunes. This isn’t as simple as deleting from the Music app though. You can download songs from iTunes and then delete them from your phone. This method will delete all of the songs on your device, and it will also delete the song from your iTunes library. It’s the fastest method to offload music on your iPhone.
There are also a number of other ways to delete music from your iPhone. You can also use the Settings app to do this.
Delete data from your iPhone
Delete data from your iPhone is often necessary for privacy reasons. But, you should keep in mind that the data is not erased permanently. It will be stored in a different location on your iPhone storage. The deletion process may take some time. You can use iCloud backup to recover deleted data. There are also third-party tools that can help you recover data from your iPhone.
The “Recently Deleted” folder on iCloud is a good place to find your deleted files. It stores deleted files for 30 days. You can restore your deleted files by going to this folder. Some iOS apps also have their own “Recently Deleted” folder.
You can also restore your data from an iCloud backup. It works with both Windows and Mac computers. You can backup multiple data items, and you can preview the data before deleting it. You can even disable non-essential apps in your backup files.
You can also delete photos on your iPhone. To do so, go to the Photos app, and tap the trash can icon. Select multiple photos and videos by holding down the select button. You can also manually delete large attachments by using the “Review Large Attachments” feature.
You can also use iSeeker to recover your deleted data. This tool works with iTunes backup files, and you can restore data from iCloud. You can recover data from an iCloud backup even if you have factory reset your iPhone.
You can also use an iPhone eraser to delete data. This eraser is easy to use and secures the deletion of your data. It also helps you delete corrupted downloads and cache files. It also helps you remove junk files and save space on your phone.